Welcome, fellow AI art enthusiasts!
Today, we’re diving deep into the art of mage.space model selection.
It’s a crucial skill that can dramatically elevate your AI-generated artwork.
Think of it as choosing the right paintbrush for your masterpiece.
Picking the perfect model isn’t just about clicking a button.
It’s about understanding the nuances, the strengths, and the ideal applications of each option available to you.
By the end of this guide, you’ll be equipped to make informed choices, unlocking consistent, high-quality results that truly match your artistic vision.
Let’s get started on this exciting journey to AI art perfection!
1. How to choose mage space best model for your needs?
Unlocking the full potential of AI art on Mage.Space hinges significantly on your mage.space model selection strategy.
It’s not merely about generating an image; it’s about crafting a specific vision with precision and style.
The right model can transform a generic prompt into a breathtaking piece of art, perfectly aligning with your creative intent.
Conversely, a suboptimal model choice can lead to frustrating, inconsistent, or downright bizarre results.
You might find yourself wondering why your “epic fantasy landscape” looks more like a child’s crayon drawing.
This guide aims to demystify the process, turning you into a model selection maestro.
We’ll cover everything from the foundational concepts to advanced techniques.
You’ll learn how to navigate Mage.Space’s vast library, understand what makes each model tick, and apply this knowledge to achieve your desired artistic outcome every single time.
It’s about gaining control, confidence, and consistency in your AI art journey.
Get ready to refine your workflow and produce stunning visuals that truly stand out!
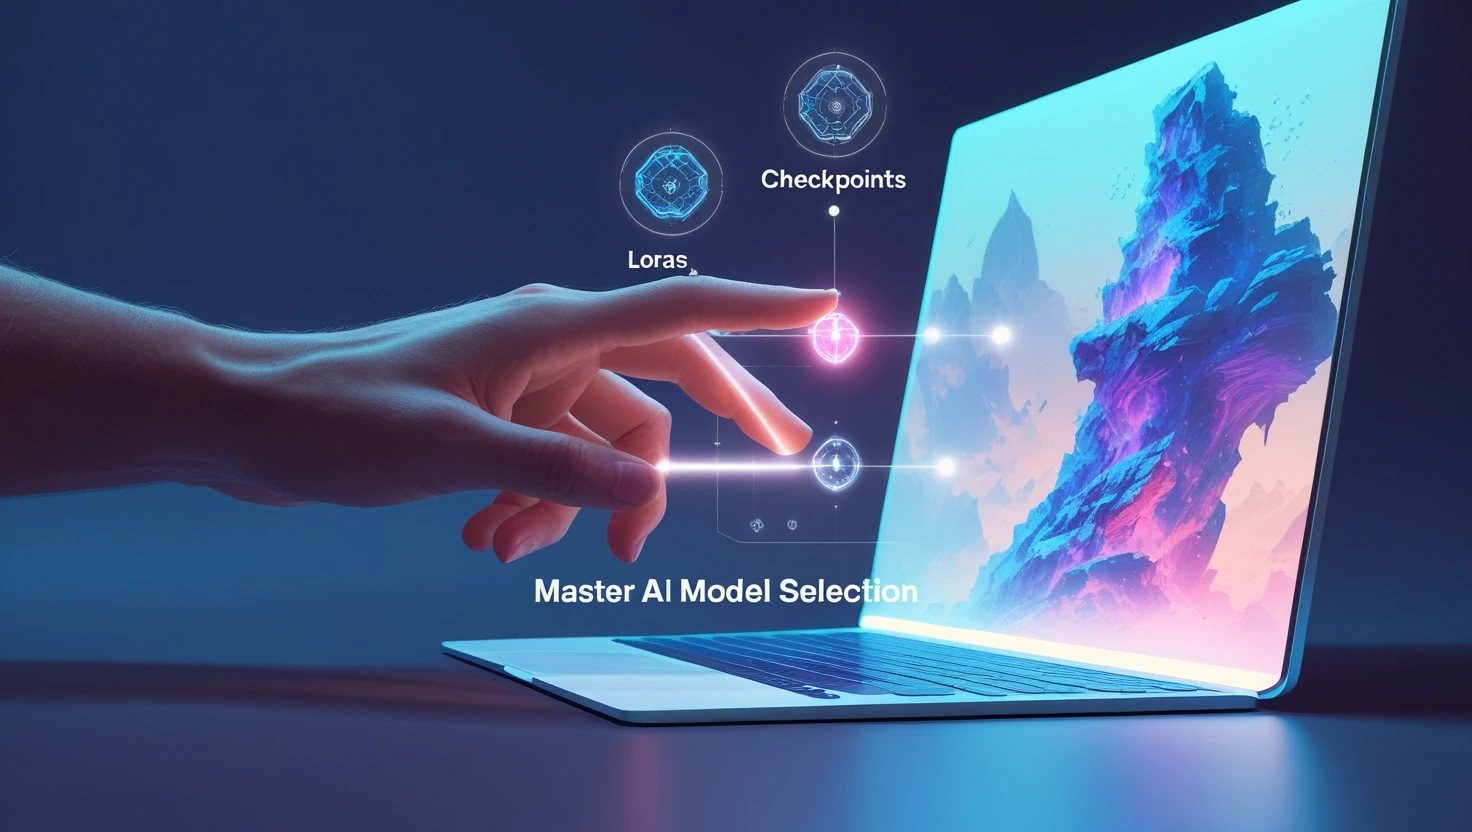
2. Understanding the Mage.Space AI Model Ecosystem:
When you’re exploring mage.space model selection, you’ll encounter a few key terms: Checkpoints, LoRAs, and VAEs.
Let’s break down what each of these powerful components does.
Checkpoints (Base Models)
Think of a Checkpoint model as the entire brain of your AI artist.
These are large, foundational models, like Stable Diffusion 1.5 (SD 1.5) or Stable Diffusion XL (SDXL), that have been trained on massive datasets of images and text.
They understand general concepts, styles, and how to generate a wide array of images from scratch.
When you select a Checkpoint, you’re essentially choosing the core artistic personality and knowledge base for your generation.
Different Checkpoints have distinct aesthetic biases; some lean towards realism, others anime, or even specific artistic movements.
LoRAs (Low-Rank Adaptation)
Now, if Checkpoints are the brain, LoRAs are like specialized skill sets or knowledge packs.
LoRAs are much smaller files that “adapt” a base Checkpoint model to produce very specific styles, characters, objects, or poses.
They’re trained on a much smaller, focused dataset.
For example, you might use a LoRA to generate images in the style of a particular artist, or to consistently render a specific character.
You always use a LoRA in conjunction with a Checkpoint model; it fine-tunes the Checkpoint’s output without retraining the entire large model.
This is incredibly efficient and powerful for adding precise details or stylistic flair.
VAEs (Variational Autoencoders)
VAEs are the unsung heroes of image fidelity.
They act as the “decoder” part of the image generation process, taking the raw output from the Checkpoint (and LoRA, if used) and making it look visually appealing and coherent.
A good VAE ensures better color accuracy, sharper details, and overall higher quality in the final image, especially for things like eyes, faces, and skin tones.
Sometimes, a Checkpoint model will have a VAE “baked in,” but often, you’ll have the option to select a separate VAE.
Choosing the right VAE can significantly improve the aesthetic quality of your generated images, making them less blurry or distorted.
It’s a subtle but impactful choice in your mage.space model selection.
Here’s a quick overview:
| Model Type | Purpose | Size | Usage | Impact |
|---|---|---|---|---|
| Checkpoint | Core image generation, general style | Large | Primary selection | Defines overall aesthetic |
| LoRA | Style/character adaptation, specific details | Small | Secondary, used with Checkpoint | Fine-tunes style, adds specific elements |
| VAE | Image decoding, color & detail enhancement | Small | Optional, used with Checkpoint | Improves visual fidelity, reduces artifacts |
Understanding these components is your first step towards truly mastering mage.space model selection and achieving fantastic results.
3. Why Strategic Mage.Space Model Selection is Critical Step?
You might be thinking, “Does it really matter which model I pick?”
The answer is a resounding yes, especially when it comes to mage.space model selection.
It’s absolutely fundamental to realizing your artistic vision with AI.
Imagine trying to paint a watercolor landscape with thick oil paints – it just wouldn’t work, right?
The same principle applies here.
Every model has its own unique “personality” and training data.
This means each model excels at different styles, subjects, and levels of detail.
If you’re aiming for a hyper-realistic portrait, using an anime-focused model will likely leave you frustrated and with images that miss the mark entirely.
You’ll get anime-style portraits, not realism.
Strategic model selection directly impacts the quality, consistency, and style of your output.
It dictates the color palette, the textural rendering, the character’s anatomy, and even the overall mood of your image.
A well-chosen model can save you countless hours of prompt engineering, as it already has a foundational understanding of the aesthetic you’re pursuing.
Consider this: using a robust SDXL-based model for complex compositions and fine details will yield superior results compared to an older SD 1.5 model, which might struggle with intricate scenes.
Similarly, if you want a specific “cinematic” look, there are models explicitly trained for that.
Ignoring this crucial step is like trying to drive a nail with a screwdriver; you might eventually get there, but it’ll be far less efficient and effective.
Ultimately, mastering mage.space model selection empowers you to have greater creative control.
It allows you to move beyond random generations and intentionally guide the AI towards the stunning artwork you envision.
It’s about working smarter, not just prompting harder, to achieve truly professional-looking results.
4. Selecting Models Within the Mage.Space Interface
Ready to dive in and make your first mage.space model selection?
Navigating the interface is quite straightforward once you know where to look.
First, after logging into Mage.Space (or even just visiting the site for free generation), you’ll typically see the main image generation panel.
Look for a section, usually near the top or sidebar, labeled “Models” or “Base Model.”
This is where your journey begins.
Clicking on this section will open up a dropdown menu or a dedicated model browser.
Here, you’ll find a vast library of available Checkpoint models.
Mage.Space often categorizes these models to help you narrow down your choices.
You might see tabs or filters for “Trending,” “New,” “Recommended,” or categories like “Anime,” “Realistic,” “Fantasy,” “Abstract,” and so on.
Let’s walk through it:
- Locate the Model Selector: On the main generation page, find the “Model” dropdown.
- Open the Model Library: Click the dropdown to reveal the list of available Checkpoints.
- Use Filters and Search:
- Search Bar: If you have a specific model name in mind (e.g., “DreamShaper”), type it in.
- Categories/Tags: Explore predefined categories like “Realistic” or “Anime” to see models tailored to those styles.
- Sorting Options: You might be able to sort by “Popularity,” “Newest,” or “Alphabetical” to discover fresh options or community favorites.
- Review Model Previews: Many models will display small preview images generated with that specific model.
These are incredibly helpful for getting a quick visual sense of the model’s aesthetic.
- Select Your Model: Once you’ve found a Checkpoint that looks promising, simply click on it to select it.
The interface will usually show the selected model’s name.
After selecting your Checkpoint, remember to also check for LoRA and VAE options, which are usually in separate, but nearby, dropdowns.
These allow for further fine-tuning, as we discussed earlier.
Don’t be afraid to click around and explore; Mage.Space’s interface is designed to be user-friendly, making your initial mage.space model selection a smooth experience.
5. Exploring Mage.Space’s Diverse Model Library: Ideal Use Cases
Mage.Space boasts an incredibly diverse model library, offering a playground for any artistic inclination.
Understanding the unique characteristics of these models is key to making an informed mage.space model selection.
Let’s explore some common categories and their ideal use cases.
1. Realistic & Photorealistic Models:
- Strengths: Excels at generating lifelike images of people, objects, landscapes, and architectural scenes.
These models are trained on vast datasets of real-world photographs.
- Ideal Use Cases: Creating product mock-ups, realistic character designs, architectural visualizations, environmental art, or stunning natural scenes.
- Examples: Models often named “RealisticVision,” “PhotoReal,” or “AbsoluteReality” fall into this category.
2. Anime & Manga Models:
- Strengths: Specialized in generating images with distinct anime art styles, including various sub-genres like shonen, shojo, chibi, or mecha.
They understand anime anatomy, shading, and color palettes.
- Ideal Use Cases: Character design for anime/manga projects, fan art, creating unique avatars, or visual novel assets.
- Examples: Look for models like “Anything V5,” “AbyssOrangeMix,” or those with “Anime” in their name.
3. Fantasy & Sci-Fi Models:
- Strengths: Designed to generate imaginative worlds, mythical creatures, futuristic cityscapes, and epic battle scenes.
They often have a dramatic, painterly, or highly detailed aesthetic.
- Ideal Use Cases: Concept art for games or films, book cover illustrations, creating fantastical creature designs, or exploring futuristic themes.
- Examples: Models such as “DreamShaper,” “Deliberate,” or those with “Fantasy” or “SciFi” in their title are great starting points.
4. Artistic & Stylized Models:
- Strengths: Offers unique artistic interpretations, mimicking painting styles (watercolor, oil, impressionism), abstract art, or specific aesthetic movements (cyberpunk, vaporwave).
- Ideal Use Cases: Generating unique digital art pieces, experimenting with abstract concepts, creating stylized illustrations, or designing album covers.
- Examples: “Protogen,” “RevAnimated,” or models explicitly stating an art style like “Inkpunk” or “Pixel Art.”
5. Utility Models (e.g., specific LoRAs):
- Strengths: While not a full Checkpoint, many LoRAs specialize in generating specific poses (e.g., “DynamicPose LoRA”), objects (e.g., “CuteAnimal LoRA”), or even celebrity likenesses.
- Ideal Use Cases: Adding consistent elements to a scene, ensuring specific character poses, or refining details that a base model might struggle with.
- Examples: You’ll find countless LoRAs on Mage.Space and external sites like Civitai, each with a very narrow, specialized function.
When making your mage.space model selection, always consider the primary goal of your image.
Do you need realism or a cartoonish vibe?
A general fantasy scene or a specific character in an anime style?
Matching your intention with the right model category will significantly improve your results and reduce iteration time.
6. Mage.Space Models Side-by-Side Comparison for Popular Styles
Let’s get practical with mage.space model selection and put some models head-to-head.
This comparison will help illustrate how different choices dramatically impact the final output, even with similar prompts.
We’ll focus on two popular styles: realistic portraits and anime landscapes.
Scenario 1: Realistic Female Portrait
- Prompt: “A stunning portrait of a young woman, intricate details, soft lighting, natural skin texture, studio photography, 8K, cinematic”
- Negative Prompt: “cartoon, anime, blurry, distorted, bad anatomy, ugly, deformed”
| Model | Strengths | Weaknesses | Ideal Use Case |
|---|---|---|---|
| RealisticVision V5.1 | Exceptional detail in skin, hair, and eyes. | Can sometimes lean too heavily into a “perfect” look. | High-fidelity portraits, fashion photography, realistic character concepts. |
| AbsoluteReality 1.8.1 | Excellent lighting and depth, strong understanding of human form. | May require more specific prompting for desired emotional tone. | Professional headshots, realistic figure studies, detailed concept art. |
| DreamShaper 8 | Good balance of realism and artistic touch, versatile. | Less sharp on micro-details compared to dedicated photoreal models. | Versatile realistic art, character design with a slightly stylized edge. |
- Recommendation: For pure, unadulterated photorealism, RealisticVision V5.1 is often a go-to for its crispness and detail. If you want a slightly more artistic, yet still realistic, feel, DreamShaper 8 is a fantastic all-rounder.
Scenario 2: Anime Fantasy Landscape
- Prompt: “Vibrant anime fantasy landscape, floating islands, waterfall, cherry blossoms, magical aura, Studio Ghibli inspired, volumetric lighting, highly detailed, serene”
- Negative Prompt: “realistic, ugly, blurry, deformed, low quality, bad composition”
| Model | Strengths | Weaknesses | Ideal Use Case |
|---|---|---|---|
| Anything V5 | Strong anime aesthetic, vibrant colors, good for character integration. | Can sometimes struggle with complex environmental details without LoRAs. | Classic anime scenes, character-focused anime art, manga panels. |
| AbyssOrangeMix3 (AOM3) | Excellent for soft, painterly anime styles, good for expressive skies. | Might lean too heavily into a specific “moe” aesthetic if not carefully prompted. | Dreamy anime landscapes, expressive character art, emotional scenes. |
| RevAnimated | Versatile animated style, good for dynamic scenes and unique perspectives. | Can sometimes have a slightly “generic” anime feel without specific LoRAs. | Animated series concept art, dynamic action scenes, stylized environments. |
- Recommendation: For a classic, vibrant anime feel with good environmental detail, Anything V5 is a solid choice. If you’re aiming for that soft, ethereal Studio Ghibli vibe, AbyssOrangeMix3 might capture the mood more effectively.
These comparisons highlight that your mage.space model selection isn’t just about “good” or “bad” models, but about the best fit for your specific artistic goal.
Experimentation is key, but these insights give you a strong starting point.
7. The Challenge: Picking the perfect Mage.Space model:
Making the optimal mage.space model selection doesn’t have to be a shot in the dark.
Here’s a strategic framework to guide your decision-making process, ensuring you pick the right tool for your creative project.
Step 1: Define Your Artistic Goal (The “What”)
- What style are you aiming for? (e.g., photorealistic, anime, watercolor, cyberpunk, abstract).
- What’s the main subject? (e.g., portrait, landscape, architecture, creature, object).
- What’s the desired mood or atmosphere? (e.g., vibrant, serene, dark, futuristic, whimsical).
- What level of detail do you need? (e.g., highly intricate, impressionistic, simple).
Step 2: Research Potential Models (The “How”)
- Browse Mage.Space’s Model Library: Use filters and categories (Realistic, Anime, Fantasy, etc.) to narrow down options.
- Examine Model Previews: Pay close attention to the example images provided for each model. Do they align with your artistic goal from Step 1?
- Check Community Ratings/Comments: See what other users are saying. High ratings and positive feedback often indicate a versatile and reliable model.
- Explore External Resources: Sites like Civitai are excellent for discovering new models and seeing many user-generated examples with specific prompts. This helps you understand a model’s capabilities and typical outputs.
Step 3: Experiment and Iterate (The “Test Drive”)
- Start with a Shortlist: Pick 2-3 promising models based on your research.
- Run Test Prompts: Use a simple, descriptive prompt that clearly outlines your artistic goal (e.g., “a [style] landscape with a [subject]” or “a [style] portrait of a [character]”).
- Compare Outputs: Generate a few images with each model. How do they differ? Which one comes closest to your vision?
- Adjust and Refine: Don’t be afraid to tweak your prompt or try different LoRAs with your chosen base model. Observe how the model responds.
Step 4: Evaluate and Select (The “Decision”)
- Quality: Does the model produce high-quality, aesthetically pleasing images for your prompt?
- Consistency: Can it consistently generate images in the desired style and with the intended subject?
- Efficiency: Does it require excessive prompt engineering or many negative prompts to get good results? The best models often work well with straightforward prompts.
- Compatibility: If you plan to use LoRAs or ControlNet, consider if the base model plays well with these additions.
By systematically working through this framework, your mage.space model selection will become a deliberate, informed process, leading to much more satisfying and predictable results. It’s about empowering your creativity with the right tools.
8. Prompt Engineering & Fine-Tuning for Specific Mage.Space Models
Choosing the right model is a huge step, but it’s only part of the equation.
To truly master mage.space model selection, you need to understand how to “speak” to that model through your prompts.
Think of it like this: you’ve picked your amazing new camera, but now you need to learn how to use its settings to capture the perfect shot.
Tailoring Prompts to Model Strengths:
Different models respond best to different prompting styles.
- Realistic Models: Often benefit from highly descriptive, detailed prompts focusing on lighting, textures, materials, and camera angles (e.g., “cinematic lighting, DSLR photo, sharp focus, volumetric dust”).
They understand nuances of realism.
- Anime Models: Respond well to specific anime-related keywords for styles, character features, and clothing (e.g., “cel-shaded, dynamic pose, large eyes, school uniform, mecha design”).
They’ve learned the tropes.
- Artistic/Stylized Models: Might require keywords related to art movements, specific artists, or unique aesthetics (e.g., “gothic architecture, art nouveau, by Alphonse Mucha, synthwave aesthetic”).
These models thrive on stylistic cues.
Using Model-Specific Keywords:
Some models are trained with specific keywords that trigger their unique capabilities.
For instance, a model might have been trained with the keyword “best quality” or “masterpiece” to encourage higher fidelity.
Always check the model’s description or community notes for any recommended keywords to include in your prompt.
Sometimes, a simple addition can make a world of difference.
Fine-Tuning with LoRA Strength/Weight:
When you use a LoRA, you’ll often see an option to adjust its “strength” or “weight” (usually a slider from 0 to 1, or even higher).
- Low Weight (e.g., 0.4-0.6): Good for subtle effects, blending the LoRA’s influence gently with the base model.
Useful for stylistic touches without overpowering the main image.
- Medium Weight (e.g., 0.7-0.9): A balanced approach, providing a noticeable impact from the LoRA while still leveraging the base model’s strengths.
Often a good starting point for character or object LoRAs.
- High Weight (e.g., 1.0+): For strong, dominant effects.
Use this when you want the LoRA to have maximum influence, but be careful, as it can sometimes lead to over-saturation or artifacts if too high.
Experimentation is truly your best friend here.
Generate a few images with varying LoRA weights to see how it changes the output.
This iterative process, combining astute mage.space model selection with smart prompt engineering and LoRA fine-tuning, is how you unlock truly exceptional AI art.
9. Integrating ControlNet, Negative Prompts & Other Settings
Once you’re comfortable with mage.space model selection and basic prompting, it’s time to level up your game.
Integrating advanced features like ControlNet, strategic negative prompts, and other generation settings will give you unparalleled control over your AI art.
1. Integrating ControlNet for Precision:
ControlNet is a game-changer for guiding the AI’s composition, pose, and structure.
It allows you to feed an additional image (like a sketch, a pose reference, or a depth map) to the AI, forcing it to adhere to that structure while still using your chosen model and prompt for style and content.
- How it Works: Select your base model, then enable ControlNet.
Upload your reference image and choose a preprocessor (e.g., “Canny” for edge detection, “OpenPose” for skeletal figures, “Depth” for 3D structure).
- Strategic Use: If your chosen model struggles with consistent anatomy or specific compositions, ControlNet can fix that.
For example, use an anime model for style, but an OpenPose ControlNet to ensure your character is in a very specific, dynamic pose.
This combination leverages the model’s artistic strength while providing structural accuracy.
2. Mastering Negative Prompts for Model-Specific Enhancements:
Negative prompts tell the AI what not to include or what qualities to avoid.
They are incredibly powerful, especially when combined with a specific model.
- General Negative Prompts: You’re probably already using common ones like “blurry, low quality, deformed, ugly.”
- Model-Specific Negative Prompts: Some models might have common failure modes.
For example, an older anime model might frequently generate “extra limbs” or “bad hands.”
Adding these specific terms to your negative prompt can mitigate those issues.
Conversely, if a realistic model over-smoothes skin, you might add “smooth skin” to your negative prompt to encourage more texture.
- Refining Style: If your chosen model is slightly off-style (e.g., too cartoony when you want slightly more mature anime), you can add “cartoony” to your negative prompt to push it towards your desired aesthetic.
3. Optimizing Other Generation Settings:
- CFG Scale (Guidance Scale): This controls how closely the AI adheres to your prompt.
- Lower CFG (e.g., 5-7): More creative freedom for the AI, can lead to more surprising results.
- Higher CFG (e.g., 7-12): Forces the AI to stick very closely to your prompt, often resulting in more direct interpretations but potentially less creativity.
Experiment with this based on your model and desired outcome.
- Sampling Steps: More steps generally mean more detail and higher quality, but also longer generation times.
- 20-30 Steps: Often a good balance for initial exploration and decent quality.
- 40-50+ Steps: For final, high-detail images.
Some models might perform better with fewer or more steps, so test it out.
- Sampler (Scheduler): Different samplers (e.g., DPM++ 2M Karras, Euler A) can produce slightly different aesthetics and speeds.
Experiment to find what works best with your chosen model for the desired look.
By thoughtfully combining your mage.space model selection with these advanced controls, you’ll unlock a new level of precision and artistic expression, turning your wildest ideas into stunning realities.
10. Common Issues & How to Solve Them
Even with the best mage.space model selection, you might occasionally run into hiccups.
Don’t worry, many common issues have straightforward solutions.
Let’s tackle some of the problems you might encounter.
1. Issue: Images are Distorted, Blurry, or Have Low Quality.
- Possible Causes:
- Wrong VAE: The selected VAE might not be compatible or optimal for your Checkpoint model.
- Too Few Sampling Steps: The AI didn’t have enough iterations to refine the image.
- Low Resolution: Generating at a very small resolution can lead to lack of detail.
- Model Incompatibility: Sometimes older models struggle with certain types of prompts or resolutions.
- Solutions:
- Check VAE: Try selecting a different VAE, or ensure it’s set to “Auto” if available. Some models work best with a specific VAE.
- Increase Sampling Steps: Bump up the steps to 30-50 for better detail.
- Increase Resolution: Generate at a higher base resolution, then upscale if needed.
- Switch Model: If all else fails, the model might just not be suited for your specific prompt. Try another model known for quality.
2. Issue: The Output Style Doesn’t Match My Expectation (e.g., too realistic, not anime enough).
- Possible Causes:
- Incorrect Base Model: You’ve chosen a model that doesn’t specialize in your desired style.
- Weak Prompting for Style: Your prompt isn’t emphasizing the style enough.
- LoRA Conflict: A LoRA might be pulling the style in a different direction.
- Solutions:
- Re-evaluate Base Model: Go back to your mage.space model selection and pick one that explicitly states your desired style (e.g., an “Anime” model for anime art).
- Strengthen Prompt: Add more specific style keywords (e.g., “Studio Ghibli style,” “oil painting,” “digital art”).
- Adjust LoRA Weight: If using a LoRA, try reducing its weight if it’s overriding the base style too much, or increasing it if you want more of its influence.
3. Issue: Model Not Loading or Generating Errors.
- Possible Causes:
- Temporary Server Issue: Mage.Space, like any online service, can have occasional glitches.
- Browser/Cache Issue: Stored data might be interfering.
- Incompatible Settings: A combination of settings might be causing a crash.
- Solutions:
- Refresh Page: A simple refresh often resolves temporary loading issues.
- Clear Browser Cache: Try clearing your browser’s cache and cookies.
- Try a Different Browser: See if the issue persists in another browser.
- Simplify Settings: Temporarily disable ControlNet, LoRAs, or reduce steps to see if a specific setting is causing the problem.
4. Issue: Hands, Faces, or Anatomy are Consistently Bad.
- Possible Causes:
- Model Limitation: Some models, especially older ones, struggle with complex anatomy.
- Lack of Negative Prompts: You’re not telling the AI what to avoid.
- Solutions:
- Use Specific Negative Prompts: Add “bad anatomy, deformed, extra fingers, missing fingers, ugly, mutated hands” to your negative prompt.
- Switch to an SDXL Model: SDXL-based models generally perform much better with anatomy.
- Employ ControlNet: Use an OpenPose or Depth ControlNet to guide the body and hand positions more accurately.
Remember, troubleshooting is part of the creative process.
By systematically addressing these common issues, you’ll quickly get back on track to generating stunning AI art with your chosen mage.space model selection.
11. Mage.Space Features & Community Resources
The journey of mage.space model selection is an ongoing adventure, and Mage.Space provides excellent tools and a vibrant community to help you discover and experiment.
You’re not alone in this!
1. Mage.Space’s “Explore” Section:
This is your first stop for discovering new and trending models.
- Community Showcase: The “Explore” page often displays images generated by other users, frequently indicating which models and LoRAs were used.
This is an invaluable resource.
- Trending Models: Keep an eye on models that are gaining popularity.
They’re usually popular for a reason – often producing high-quality or unique results.
- Model Tags and Filters: Use the built-in filtering system to sort models by style, popularity, or recent additions.
This helps you quickly find models relevant to your current project.
- Remix Feature: Many shared images on Mage.Space allow you to “Remix” them.
This means you can see the exact prompt, negative prompt, model, LoRAs, and settings used.
It’s an incredible learning tool!
2. External Model Repositories (e.g., Civitai, Hugging Face):
While Mage.Space has a great selection, the wider AI art community offers an even vaster ocean of models.
- Civitai.com: This is arguably the largest hub for Stable Diffusion models, LoRAs, and VAEs.
You can browse by category, popularity, or even specific creators.
Each model page typically includes:
- Numerous example images generated by the community.
- Recommended prompts and negative prompts.
- Information on compatible base models and VAEs.
- User reviews and discussions.
- Hugging Face: Another significant platform for AI models, though it might be more technical.
Many cutting-edge models are first released here.
- Importing Models: Mage.Space often allows you to import models directly from URLs (like Civitai or Hugging Face links), expanding your mage.space model selection exponentially.
3. Systematic Experimentation Tips:
To make your experimentation efficient and valuable:
- Keep a Log: Jot down which models, prompts, and settings you used for specific results.
This helps you remember what worked and what didn’t.
- Vary One Variable at a Time: When testing, change only the model, then only the LoRA, then only the CFG scale.
This isolates the impact of each setting.
- Use a Consistent Test Prompt: Have a go-to prompt that you use across different models to compare their baseline performance for a given subject or style.
- Analyze Outputs Critically: Don’t just look for “pretty.”
Ask yourself: Does it meet the style?
Is the anatomy correct?
Are the colors vibrant?
Is the composition strong?
By actively engaging with Mage.Space’s features and the broader community, you’ll continuously refine your mage.space model selection skills, discover hidden gems, and push the boundaries of your creative output.
13. FAQ:
Q1: Which Mage.Space model is best for realistic landscapes?
A1: For realistic landscapes, I’d highly recommend starting with SDXL-based models or specific photorealistic Checkpoints like “RealisticVision,” “AbsoluteReality,” or “EpicPhotogasm.” These models are trained on real-world photos and excel at natural textures, lighting, and grand compositions. Pair them with descriptive prompts focusing on light, atmosphere, and terrain.
Q2: What’s the fundamental difference between a ‘Checkpoint’ and a ‘LoRA’ and when should I use each?
A2: A Checkpoint is a large, foundational model (the “brain”) that understands general concepts and styles. Use it as your primary selection to define the overall aesthetic (e.g., realism, anime, fantasy). A LoRA is a small, specialized add-on (a “skill set”) that fine-tunes a Checkpoint for very specific styles, characters, or objects. Use a LoRA with a Checkpoint when you need to introduce a particular detail, character, or stylistic nuance that the base model might not capture perfectly on its own.
Q3: Why do my images look distorted or low-quality with certain models?
A3: This can happen for several reasons:
- Incompatible VAE: Try selecting a different VAE or letting Mage.Space auto-select one.
- Too Few Steps: Increase your sampling steps (e.g., to 30-50).
- Model Limitations: Some older or less refined models simply struggle with certain details (like hands or faces).
- Weak Negative Prompts: Ensure you’re using strong negative prompts to counter common distortions (e.g., “bad anatomy, blurry, deformed”).
- Resolution Issues: Generating at too low a resolution can also lead to poor quality.
Q4: Can I use multiple LoRAs simultaneously with a single Checkpoint model?
A4: Yes, absolutely! Mage.Space typically allows you to apply multiple LoRAs to a single Checkpoint. This is a fantastic way to combine different stylistic elements or specific subjects. For example, you could use a “Cyberpunk City” LoRA with an “Anime Character” LoRA on an “Anything V5” base model. Just be mindful of the “weight” of each LoRA; too many strong LoRAs can sometimes lead to conflicts or an over-saturated image. Experiment with different weights to find the perfect balance.
Q5: How do I find new, trending, or highly-rated models on Mage.Space?
A5: Look for the “Explore” or “Models” section on the Mage.Space interface. You’ll often find filters for “Trending,” “Popular,” “Newest,” and categories like “Realistic” or “Anime.” Additionally, check external sites like Civitai.com. It’s a huge community hub where you can browse, filter, and download thousands of models, often with example images and recommended settings. Mage.Space often lets you import these directly.
Q6: Do I need to understand the underlying base model (e.g., SDXL vs. SD 1.5) and how does it affect my workflow?
A6: Yes, it’s beneficial to understand this! SDXL is a newer, more advanced base model that generally produces higher quality, more coherent images, better anatomy, and responds more intelligently to prompts compared to SD 1.5. Many newer LoRAs are also trained specifically for SDXL. Your workflow will be affected because SDXL models often require less negative prompting for common issues (like bad hands) and can handle more complex scenes. If you’re aiming for top-tier results, especially for realism or intricate compositions, gravitating towards SDXL-based models in your mage.space model selection is usually a good strategy.
14. Conclusion:
Well, there you have it!
We’ve journeyed through the intricate world of mage.space model selection, from understanding the core components to advanced strategies and troubleshooting.
You’re now equipped with the knowledge to make informed decisions and truly elevate your AI art.
Remember, the right model isn’t just a technical choice; it’s a creative one.
It’s about finding the perfect partner for your artistic vision.
By thoughtfully considering your goals, researching available options, and embracing a spirit of experimentation, you’ll consistently produce stunning images that align with your unique style.
So, go forth, experiment with confidence, and start generating the masterpieces you’ve always envisioned!
The canvas awaits.